Why a Running Toilet Deserves Immediate Attention
A toilet that runs continuously is not just an annoyance - it is a quiet drain on water and utility costs. Even a slow, intermittent leak can add up to a significant volume of water wasted over weeks and months. The good news is that the fix rarely requires a plumber. Nearly every running toilet traces back to one of three components: the flapper, the fill valve, or the float assembly.
The flapper gets most of the blame - and sometimes it deserves it. But homeowners who replace the flapper and still hear running are often disappointed to discover the real problem was elsewhere all along. This guide walks you through a systematic diagnostic process so you fix the right thing the first time.
What you will need
Understanding the Three Main Culprits
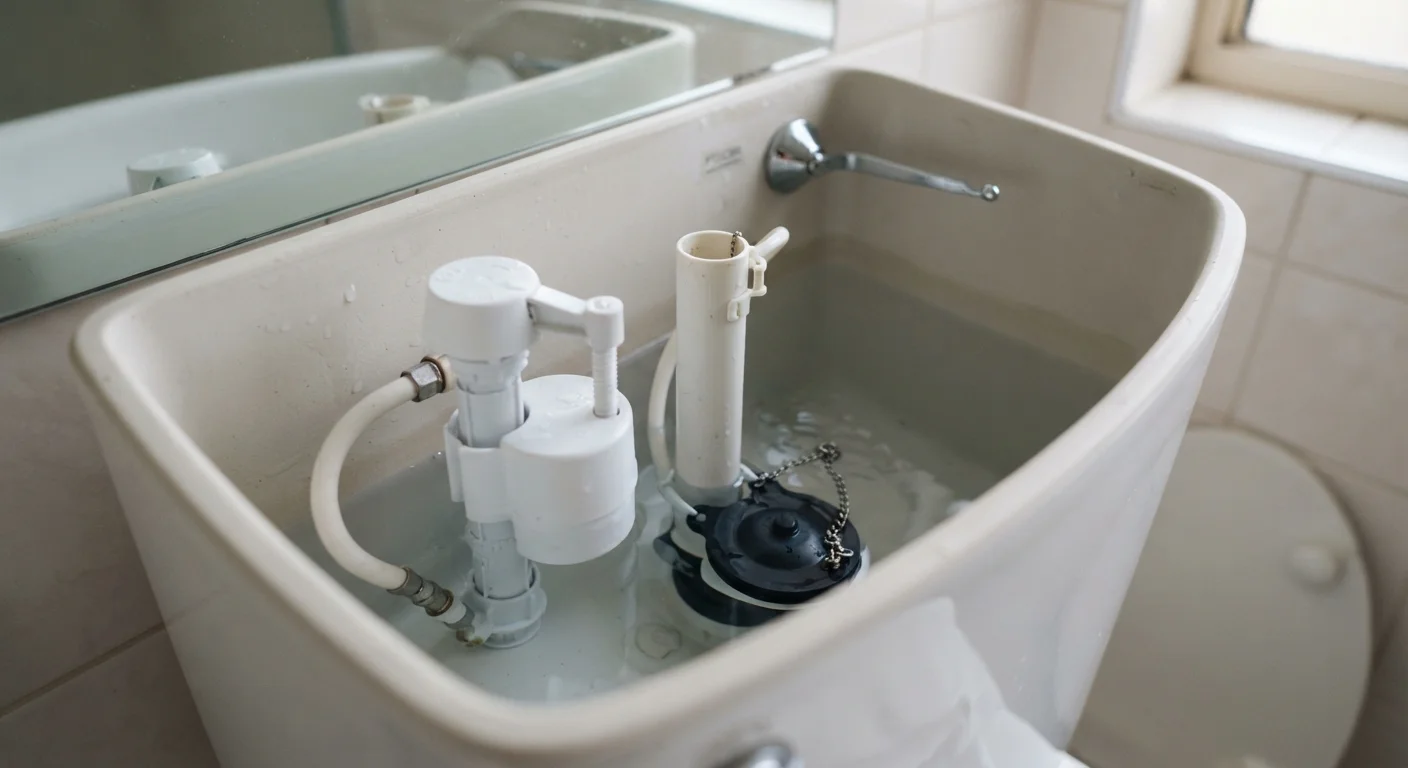
Before you touch anything, it helps to understand how a toilet tank works. After each flush, the fill valve refills the tank with water. The float - either a ball on an arm or a cup on the valve shaft - rises with the water level and signals the fill valve to shut off when the tank is full. The flapper seals the flush valve opening at the bottom of the tank, holding water until the next flush.
- Flapper failure: Rubber flappers deteriorate over time and warp, allowing water to seep continuously into the bowl.
- Fill valve failure: A worn fill valve may hiss constantly or fail to shut off, overfilling the tank.
- Float set too high: When the float is calibrated too high, the water level rises above the overflow tube and drains continuously - even though the flapper and fill valve are perfectly functional.
Food coloring or dye tablet
Placed in the tank to detect flapper leaks without disassembly.
Adjustable pliers
Used to disconnect water supply lines and unscrew fill valve lock nuts.
Replacement flapper
Swaps out a warped or deteriorated flapper that is allowing water to seep into the bowl.
Replacement fill valve
Replaces a faulty fill valve that hisses or overfills the tank after each flush.
Sponge or small cup
Removes remaining water from the tank before replacing internal components.
Knowing which component is responsible before you buy parts saves a wasted trip and ensures a lasting repair.
Step-by-Step Repair Instructions
Follow the steps below in order. The diagnostic steps come first, so you only replace the parts that are actually faulty.
Listen and observe before opening anything
Stand quietly near the toilet for 30 seconds without flushing. A constant hissing sound points to the fill valve. A periodic "phantom flush" - where the tank refills on its own every few minutes - typically indicates a slow flapper leak. Water trickling audibly into the bowl without any flushing also suggests a flapper or flush valve seat problem. Identifying the sound pattern before you open the tank saves time and narrows your diagnosis immediately.
Perform the dye test to check the flapper
Remove the tank lid and add 10-15 drops of food coloring (or one dye tablet) directly to the tank water. Do not flush. Wait 15 minutes, then look at the toilet bowl water. If color appears in the bowl, the flapper is leaking - water is seeping past it without a flush. If the bowl water stays clear, the flapper is sealing correctly and you need to look elsewhere.
Inspect the overflow tube water level
With the lid off, look at the overflow tube - the tall open pipe standing in the center of the tank. If water is spilling over its top rim, the tank is overfilling and draining constantly into the bowl. This is not a flapper problem; it is a float or fill valve issue. The correct water level should sit approximately one inch below the top of the overflow tube. Check this before replacing any parts.
Adjust or replace the float
If the water level is too high, adjust the float to lower it. On a ball-float assembly (older toilets), bend the float arm gently downward or turn its adjustment screw. On a modern cup-float or tower-float fill valve, pinch the clip on the side of the float and slide it down the valve shaft until the water settles one inch below the overflow tube rim. Flush once to confirm the tank refills to the correct level and stops.
Replace the flapper if the dye test confirmed a leak
Turn off the water supply at the shut-off valve, then flush to drain the tank. Unhook the old flapper from the pegs on either side of the flush valve and disconnect its chain from the flush handle lever. Take the old flapper to a hardware store to match the size - flappers are not universal. Snap the new flapper onto the pegs, attach the chain with about half an inch of slack, restore the water supply, and test with another dye check after 15 minutes.
Replace the fill valve if hissing persists
Shut off the supply valve, flush, and use a sponge to remove remaining tank water. Disconnect the supply line from the bottom of the tank. Unscrew the lock nut holding the fill valve in place, lift out the old valve, and insert the new one according to its included instructions - most snap in and secure with a hand-tightened lock nut. Reconnect the supply line, restore water, and set the float height as described in Step 4.
Keep a Spare Flapper on Hand
Flappers are inexpensive and degrade every few years regardless of use. Keeping a correctly sized spare in your bathroom cabinet means you can make the swap in minutes the next time running starts. Note your toilet's model number (usually stamped inside the tank) so you always buy the right size.
When to Call a Professional
Most running toilet repairs are well within DIY reach, but a few situations warrant a licensed plumber. If the flush valve seat - the ring the flapper presses against - is visibly cracked or corroded, the entire flush valve assembly may need replacement, which involves draining and lifting the tank. Similarly, if the tank itself shows hairline cracks, that is a job for a professional or warrants full toilet replacement.
If you have completed all of the steps above and the toilet still runs, the problem may involve a cracked flush valve seat or a damaged trip lever assembly. Contact a licensed plumber for an assessment rather than continuing to experiment, as repeated disassembly of older toilets can loosen tank bolt seals and introduce new leaks.
Older Toilets May Have Brittle Components
Toilets manufactured before the mid-1990s often have older-style fill valves and ball-float assemblies made from materials that can crack when disturbed. Handle all tank components gently, and avoid forcing stuck lock nuts - use penetrating lubricant and allow it to sit before applying torque.