What Is R-Value and Why It Matters
R-value is the single most important number in any insulation conversation. It measures a material's resistance to heat flow - the higher the R-value, the better that material slows heat from passing through walls, floors, and ceilings. Heat naturally moves from warm areas to cooler ones, so in winter it tries to escape your home, and in summer it tries to enter. Insulation slows that transfer.
R-values are additive: two layers of R-19 insulation together give you roughly R-38. However, compression reduces effectiveness - a batt squeezed into a space that's too small performs below its rated value. Always match the product to the available cavity depth.
R-value
A number that measures how well a material resists heat flow. Higher R-values indicate better insulating performance.
Thermal bridging
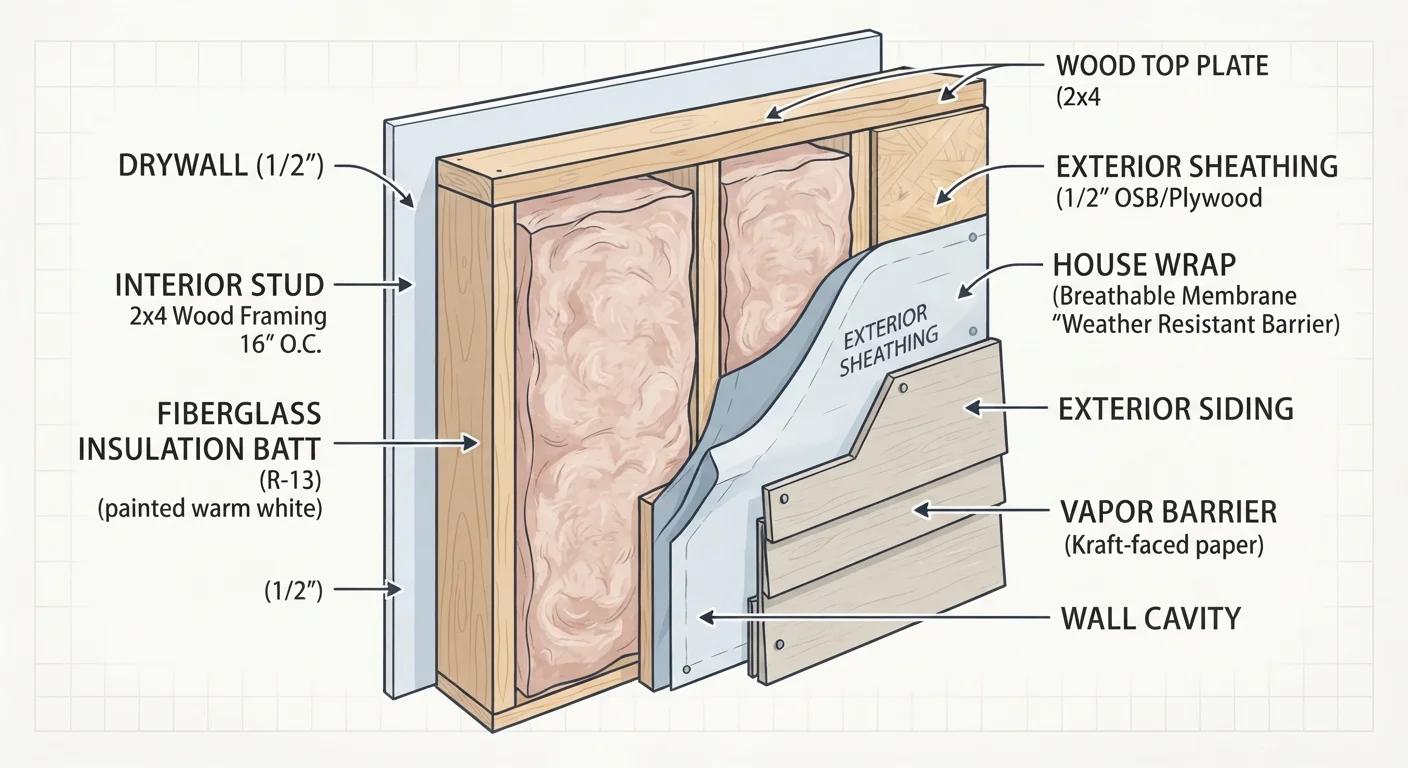
When heat bypasses insulation by traveling through a more conductive material - like a wood stud - reducing the overall insulating effect of a wall.
Vapor retarder
A material (such as plastic sheeting or certain foam boards) that slows moisture movement through walls and ceilings, helping prevent condensation inside the insulation.
Air sealing
Closing gaps and cracks in the building envelope - around pipes, wires, and joints - to stop drafts. Insulation alone does not stop air movement.
Blower door test
A diagnostic test where a fan is mounted in a doorway and used to depressurize the home, revealing where air is leaking in or out.
Rim joist
The horizontal framing member that rests on top of your foundation wall, enclosing the floor system. Often a major source of heat loss in older homes.
The Department of Energy publishes R-value recommendations by U.S. climate zone and by location within the home (attic, wall, floor). These are practical starting points, not minimums to ignore.
Common Insulation Materials Explained
No single material is right for every application. Here's how the most common types compare:
- Fiberglass batts: Pre-cut panels that fit standard stud and joist spacing. Widely available, relatively affordable, and straightforward to handle with basic protective gear. Best for open wall cavities and attic floors.
- Blown-in cellulose: Shredded recycled paper treated with fire retardant, blown into attics or closed cavities using special equipment. Conforms to irregular spaces and settles slightly over years.
- Spray foam (open- and closed-cell): Applied as a liquid that expands and hardens. Closed-cell foam provides both insulation and a vapor barrier; open-cell foam is softer and better for sound reduction. Both require professional application due to chemical handling and off-gassing risks.
- Mineral wool (rock or slag wool): Dense batts with good fire resistance and moderate soundproofing. Holds up well in humid conditions compared to fiberglass.
- Rigid foam board: Used on exterior walls, basement walls, and under slabs. Provides continuous insulation without thermal bridging through studs.
Match Material to Location
Don't default to one product for every area of your home. Fiberglass batts work well in open attic floors, but closed-cell spray foam is better suited to rim joists where moisture resistance matters. Selecting the right material for each specific location - rather than buying in bulk - produces better results and avoids waste.
Where Insulation Has the Biggest Impact
Not every square foot of your home loses heat at the same rate. Prioritizing the right locations delivers the most noticeable improvement in comfort and energy use.
- Attic: Heat rises, making the attic the single most impactful location to address. An under-insulated attic can account for a significant share of a home's heating and cooling load.
- Crawl space and basement: Cold floors and damp conditions in these areas indicate heat loss through the floor system or foundation walls. The correct strategy depends on whether the crawl space is vented or conditioned.
- Exterior walls: Harder to retrofit without renovation, but worth addressing during any remodel. Blown-in or rigid foam approaches can improve existing walls.
- Rim joists: The framing that sits on top of the foundation wall is often completely uninsulated in older homes, yet it's one of the easiest and highest-return projects a DIYer can tackle with cut-and-cobble rigid foam.
If you're building a maintenance plan around insulation improvements, our guide to first-year homeowner maintenance can help you sequence projects sensibly.
How to Assess Your Home's Current Insulation
Before buying materials, find out what you already have. In the attic, use a ruler to measure insulation depth - most types have a known R-value per inch, so depth tells you roughly where you stand. Look for gaps, compressed areas, or signs of moisture damage.
In walls, remove an outlet cover on an exterior wall and use a flashlight or thin wire to probe the cavity. You can also hire a professional to conduct a blower door test or infrared scan, which reveals air leaks and thermal weak spots far more precisely than visual inspection alone.
Watch for Moisture Before Adding Insulation
Installing new insulation over a moisture problem traps dampness and can accelerate mold growth and structural decay. If you find staining, soft wood, or musty odors during your assessment, address the moisture source first. Adding insulation to a wet space compounds the damage rather than solving it.
Document what you find before doing anything else. Knowing your starting point prevents over-spending and helps you focus on locations where improvement actually matters. Keep in mind that common home improvement myths - like the idea that more insulation always solves comfort problems - can lead you to spend money in the wrong places.
DIY vs. Professional Installation
Fiberglass batts in an accessible attic, rigid foam in a crawl space, and mineral wool batts in an open wall cavity are all reasonable DIY projects for a careful homeowner. Wear an N95 respirator, safety glasses, and gloves, and follow manufacturer guidance on vapor retarder placement.
Spray foam, on the other hand, requires professional application. The chemicals involved are hazardous during application, and improper mixing ratios produce foam that never fully cures. Blown-in cellulose sits in the middle - rental blower machines are available, but the technique has a learning curve.
Any insulation work near electrical wiring, gas lines, or structural elements warrants a licensed professional. If your project touches those systems, consult the appropriate licensed tradesperson before proceeding. Also consider whether your project may need a permit - our guide to permits and inspections explains when approval is typically required and what the inspection process looks like.
This article is for general informational purposes only. Always consult local building codes and licensed professionals before undertaking home improvement projects, particularly those involving structural, electrical, or gas systems.